LED lights have changed the way we understand illumination as a whole. You’ll see LEDs used in just about anything, ranging from industrial machines to Halloween decorations. We’ve figured out how to build LEDs on the cheap, and the whole market exploded.
One of the more interesting applications for LEDs is vehicle-mounted LED light bars. This is probably the one application where LED technology is being pushed to its limits. Choosing the right LED bar isn’t as easy as just bolting the first one you come across to your car. There are a few things you need to consider before making your choice.
And Then There was Light
We, humans, have only recently become nocturnal creatures. Up until we knew how to fight off darkness using artificial light, we wouldn’t wander off too far once the sun went down. That being said, learning how to illuminate the darkness didn’t only allow us to function at night, but it also started what appears to be a never-ending race for more light.
The invention of the incandescent lightbulb was a game-changer event. However, it quickly became obvious to many that this type of technology had its limitation. Sure, it was better than kerosene lamps that gave the 17th-century streets of major cities some light. But it wasn’t enough.
Society was eager to find a better way of fighting the darkness, which ultimately led us to highly advanced filament bulbs, neon lights, and a whole other array of inventions. Today, when the world is all about efficiency, most of these light sources are falling short.
Why LED?
LEDs or Light Emitting Diodes were an accidental invention. The man behind this technology, a young scientist by the name of Nick Holonyak, Jr, was actually looking to make a laser. A semiconductor laser, to be specific.
What he came up with wasn’t really a laser, but a new type of light source that used semiconductors instead of a filament. Unlike the regular incandescent bulb, you didn’t have to run so much power through the filament to get it to glow.
Instead, all you really had to do was run a small amount of power through the semiconductor and it would start giving off light. Once Holonyak released the technology into the ether, it took but a decade or so for it to go fully mainstream. Different engineers and organizations developed the technology in different ways, resulting in a plethora of awesome LED inventions.
Over time, we’ve grasped the full scope of advantages that LED technology had over incandescent lights:
- LEDs are more efficient – A LED lamp is up to 75% more efficient than its counterparts. That’s a serious reduction in energy consumption often makes a world of difference.
- LEDs last for far longer – Another important advantage of LED is the fact that these lights last for much longer than incandescent light sources. In fact, they last up to 25 times longer.
- Low heat emissions – The fact that there’s very little power running through the semiconductor combined with LEDs increasingly high efficiency means that the level of heat output is extremely low.
These reasons are just some of the many that are pushing the LED into all aspects of our lives. One place where LEDs are flourishing is vehicle illumination.
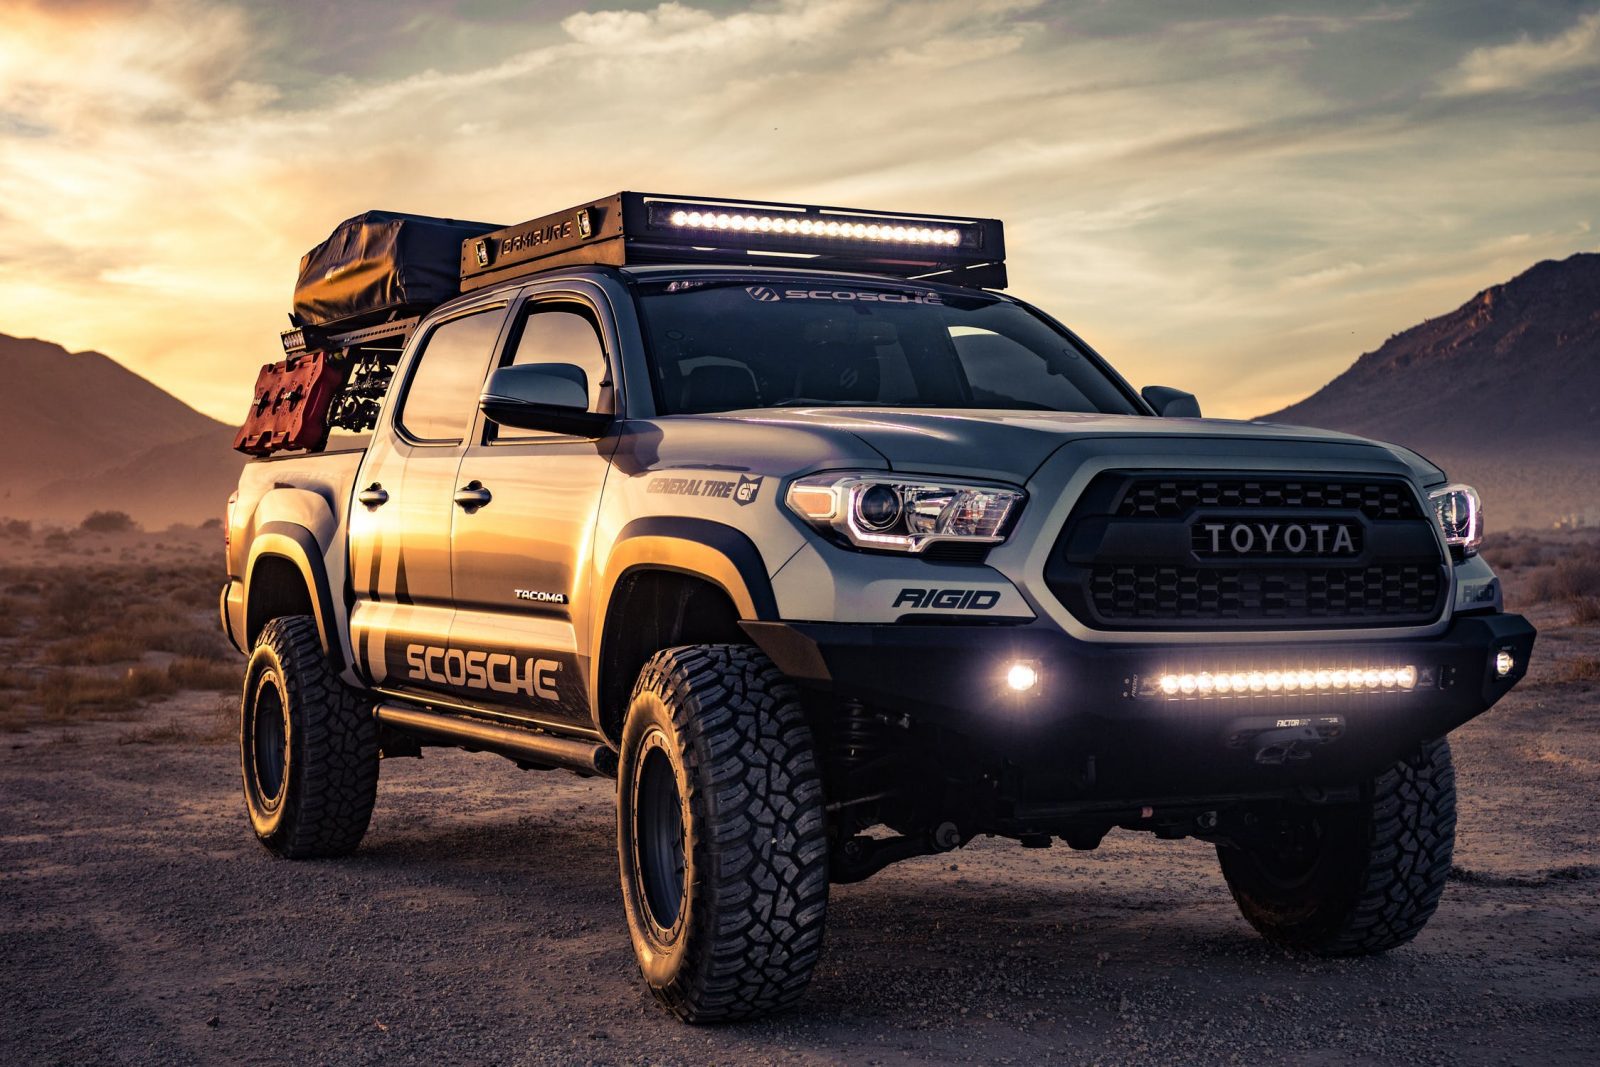
Vehicle Mounted LED Bars – the Basics
Once the LED technology became advanced enough where you could get a massive amount of lumens from a fairly compact package, it was only a matter of time before it would be used in the automotive industry.
LED light bars were among the first automotive applications of this technology if we exclude interior lighting. Someone, somewhere figured out that stacking many powerful LED lights in a row and bolting them onto a truck could be a cool idea. And it was.
Modern LED light bars are the go-to choice of illumination for drivers who either off-road at night, hunt, or simply want every bit of light they can get for their car. Choosing the right LED light bar for your needs takes a bit of planning. Let’s start with the basics.
Size Matters
Size is one of the main factors to look for when choosing LED light bar. There are two reasons why size matters. For one, a larger bar has room for more LEDs, which can (but doesn’t have to) increase the light output of your rig.
The other, often more important reason why size matters, is installation. If you’re running a massive Steelcraft bumper on your truck, chances are that you can get away with as big of a light bar as you want.
However, if you’re running a stock rig or something that isn’t as beefy, size might be an issue. At the end of the day, there isn’t really much correlation between size and performance in the world of LED light bars.
You can get plenty of lumens from a small bar. For example, the most popular version of the Baja Designs ONX6 is their 10” bar that spits out anywhere from 9,230 to 12,450 lumens depending on the type you choose. That’s a lot of lumens for such a small unit, not to mention that the Racer edition throws that light incredibly far for its size.
LED Color Temperature
All LED lights have a color temperature. We measure this temperature in Kelvins. The idea behind this is simple – the warmer the light (closer to the red part of the spectrum) the lower it is on the Kelvin scale. The colder the light temperature (closer to the white part of the spectrum), the higher it is on the scale.
Choosing the right color temperature isn’t only a matter of aesthetics. There are companies out there that offer RBG light bars if you’re in that sort of thing. But once you leave the world of parking lot meetups and car shows, the color temperature begins to matter. A lot.
As it turns out, the way we perceive color can impact our perception of terrain and depth at night. For example, if you plan on doing plenty of off-road driving at night, getting a light bar that burns at 5000K is probably the best way to go.
This color temperature where you’re getting the most realistic feedback from the terrain ahead. You’ll be able to discern real colors of various terrain features with little to no issues. Going any colder than this will give you an illusion of better illumination, but such cold light temperatures are taxing on your eyes. So much so that eye fatigue becomes an issue.
IP Ratings
Designing and building equipment that is meant to be used outside introduces a number of new unknowns to the equation. Indoor equipment has to operate in a fairly stable environment, while the stuff we use outdoors has to endure much more.
In order to make the outdoor equipment usable at all, the industry came together and devised a standardized method of protecting sensitive electronics and other devices. IP is essentially a metric of how well a device can withstand the intrusion of various contaminants ranging from water to dust.
An average IP rating has two digits after the ‘IP” part. The first digit goes from 0 to 6 and tells you how well a device is protected from the intrusion of solid particulates. Things such as dust, mud, and similar.
The second digit goes from 0 to 8 and tells you how well the device is protected from liquid contaminants. In both cases, 0 represents no protection while the highest value represents maximum protection.
How does any of this relate to LED bars? It’s quite simple. You’ve probably seen a whole lot of highly tempting LED light bars that seem to offer great performance at super cheap prices. Right away that should tell you something is off.
One of the areas where cheap LED light bars fall short is the IP, or Ingress Protection rating. You’ll find that some don’t have it at all, while others offer inadequate protection. In order to help you avoid such deceitful products, we’ve put together this IP rating chart.
First Digit:
0 – Sometimes marked with an X instead of 0. Offers no protection against solid particulates of any kind.
1 – Limited protection against solid objects larger than 50 mm
2 – Protection against solid objects larger than 12 mm
3 – Protection against solid objects larger than 2.5 mm (various tools and similar).
4 – Protection against solid objects larger than 1 mm (tiny tools and invasive small objects)
5 – Partial protection against dust and other particulates, in such a way that doesn’t impede the performance of the internal components.
6 – Full protection against dust and other particulates, including a vacuum seal, tested against continuous airflow.
Second Digit:
0 – Sometimes marked with an X instead of 0. Offers no protection against liquids of any kind.
1 – Protection against vertically falling droplets
2 – Protection against vertically dripping water when the device is up to 15° off vertical.
3 – Protection against direct liquid spray at angles up to 60° off vertical.
4 – Protection against splashing water from any direction, for at least 10 minutes
5 – Protection against low-pressure jets (6.3 mm) of direct water exposure at any angle (limited ingress permitted with no harmful effects).
6 – Protection against powerful jets (12.5 mm nozzle) of direct water exposure.
7 – Protection against full immersion for up to 30 minutes at depths between 15 cm and 1 meter
8 – Protection against longer immersion at higher depths than 1 meter
Connector Types and Mounting
The last item on our list has to do with actually mounting the light bar to your vehicle. First, you need to figure out what kind of connector your vehicle’s wiring harness requires. Either take a look at the harness yourself or have a technician determine which type of harness you have. The key is to know this information before selecting a light bar.
Furthermore, not all manufacturers ship their light bars with wiring harnesses included. It’s not too big of a deal since you can get a wiring harness as a standalone product, but it’s good to know before you make your choice.
Once you’ve figured out how to connect the bar to your vehicle’s wiring, it’s time to figure out how to mount it, or better yet, where?
Bumper
Many people decide to mount their light bars on their front bumpers. There are several benefits to this approach, starting with the fact that the light bar is in the same plane as your headlights.
Mounting a light bar to your bumper usually requires some modifications. You’ll need to drill holes in your bumper, which usually isn’t an issue. Make sure that there are no important components inside the bumper where you’re planning on drilling the hole.
Also, when mounting the light bar to the bumper, it’s a good idea to use specialty bolts that require special tools to remove. As you can imagine, LED light bars are a hot commodity for those with sticky fingers. By using specialty bolts, you’ll deter most theft attempts.
Roof
The other popular mounting option is the roof. There are several reasons why the roof might be a better option than the bumper. For one, there are light bars that can be mounted to the roof without you having to make permanent modifications to your vehicle.
Additionally, placing the light bar on the roof gives you a better angle of light, which removes a lot of sharp shadows when you run your light bar.
Be Responsible with your Lights
No matter which light bar you chose, remember to be responsible with it. These devices are illegal to use on public roads and for a good reason. Blasting 10k lumens into someone’s face is no fun and can seriously impede that person’s ability to drive.
Use your light bar when you go off-road, or at whatever events you’re preparing your rig for. Using these powerful light sources in traffic only gives the rest of the community a bad rep. We hope that this short guide was helpful. Our goal was to arm you with the most important information regarding LED light bars so that you find the one that best fits your needs.